Introduction
Biofloc technology (BFT) is a revolutionary aquaculture method that enhances fish growth by maintaining water quality and reducing feed costs. This system relies on beneficial microorganisms that convert waste materials into protein-rich feed, creating a self-sustaining ecosystem. If you're looking to set up a biofloc tank for maximum fish growth, this guide will provide you with step-by-step instructions to ensure a successful and productive system.
1. Understanding Biofloc Technology
Biofloc technology works by using microbial activity to balance the water quality and reduce ammonia toxicity. The key elements of a biofloc system include:
- Heterotrophic Bacteria: These bacteria convert ammonia into proteins, preventing toxic buildup.
- Suspended Particles: The biofloc particles act as an additional food source for fish.
- Aeration System: Constant aeration keeps the microbial community active and prevents water stagnation.
This system is particularly beneficial for species like tilapia, catfish, shrimp, and carp, as it enhances growth rates and improves overall health.
2. Choosing the Right Location
Before setting up your biofloc tank, choose a suitable location with the following factors in mind:
- Adequate Sunlight: Sunlight promotes microbial growth and supports biofloc formation.
- Protection from Extreme Weather: Set up a greenhouse or protective covering to regulate temperature.
- Access to Water and Electricity: Ensure a continuous water supply and power source for aeration.
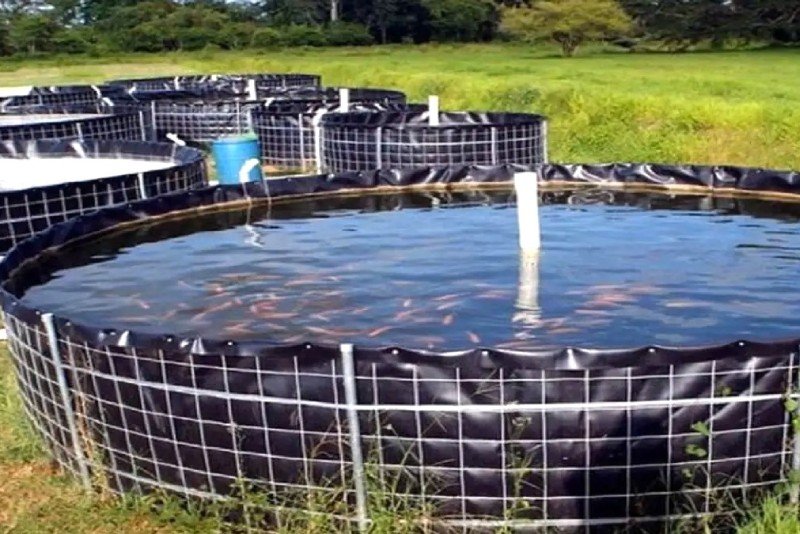
3. Selecting the Right Tank
A biofloc tank should be durable and capable of holding a significant amount of water. The most commonly used tanks are:
- HDPE (High-Density Polyethylene) Tanks: Long-lasting and resistant to corrosion.
- Tarpaulin Tanks: Affordable and easy to set up.
- Cement Tanks: More permanent but require additional maintenance.
Tank Size Recommendations
- For small-scale farming: 1,000 to 5,000 liters
- For commercial farming: 10,000 liters or more
The tank should have a depth of at least 3-4 feet to maintain proper biofloc formation.
4. Water Preparation
The water used in biofloc tanks must be properly prepared to create an ideal environment for fish growth. Follow these steps:
Step 1: Dechlorinate the Water
Chlorinated water can harm beneficial bacteria. Use dechlorinators or allow water to sit for 24 hours before use.
Step 2: Maintain the Correct Salinity
For freshwater fish, keep salinity between 0 to 5 ppt. For shrimp farming, 10 to 15 ppt is ideal.
Step 3: Adjust pH Levels
The ideal pH range for a biofloc system is 6.5 to 8.0. Add lime or sodium bicarbonate if pH drops below this range.
5. Setting Up the Aeration System
Proper aeration is crucial for biofloc technology to function effectively. Without sufficient oxygen, fish and microbial communities can suffer.
- Use Air Blowers or Aerators: Paddle wheel aerators or diffused aeration systems work best.
- Position Air Stones Evenly: Place them across the tank to maintain uniform oxygen distribution.
- Ensure Continuous Aeration: The system should run 24/7 to prevent oxygen depletion.
6. Introducing Biofloc Culture
To establish a healthy biofloc system, you need to introduce a carbon source that will promote bacterial growth. Common carbon sources include:
- Molasses
- Rice bran
- Corn starch
Step-by-Step Process
- Calculate the Carbon-to-Nitrogen Ratio (C/N Ratio): A ratio of 15:1 or 20:1 is ideal for biofloc formation.
- Introduce Beneficial Bacteria: Add probiotics such as Bacillus species to accelerate microbial activity.
- Monitor Biofloc Formation: Within 7-10 days, you should see suspended biofloc particles in the water.
7. Selecting and Stocking Fish
Choose fish species that thrive in biofloc conditions. The best options include:
- Tilapia
- Catfish
- Carp
- Shrimp
Stocking Density Guidelines
- Tilapia: 200-300 fish per cubic meter
- Shrimp: 100-150 shrimp per cubic meter
- Catfish: 150-200 fish per cubic meter
Introduce fish gradually to avoid shocking the system.
8. Feeding Strategy for Maximum Growth
Biofloc technology reduces dependency on commercial feed by allowing fish to consume suspended biofloc particles. However, you still need to provide supplementary feed.
Best Practices for Feeding
- Use high-protein feed (28-32%) for better growth.
- Feed in small amounts 2-3 times per day.
- Avoid overfeeding to prevent unnecessary waste buildup.
- Adjust feed quantity based on fish size and growth stage.
9. Water Quality Management
Maintaining optimal water conditions is key to maximizing fish growth.
Essential Parameters to Monitor
| Parameter | Ideal Range |
|---|---|
| Temperature | 25-30°C |
| pH Level | 6.5-8.0 |
| Dissolved Oxygen | 5-7 mg/L |
| Ammonia Level | <0.5 mg/L |
| Salinity | 0-5 ppt (freshwater fish) |
Use test kits to monitor these parameters daily.
How to Maintain Water Quality
- Add Probiotics: Helps maintain a healthy microbial balance.
- Perform Partial Water Changes: Only if ammonia levels rise.
- Use Aeration Efficiently: Prevents oxygen depletion and sludge accumulation.
10. Harvesting and Maintenance
Harvesting Fish
Once fish reach market size, use the following techniques for efficient harvesting:
- Reduce feeding 24 hours before harvest to clear digestive tracts.
- Use fine mesh nets to avoid injuring fish.
- Transfer fish to holding tanks with aeration before selling.
Regular Maintenance
- Remove uneaten food and waste weekly.
- Check aeration equipment daily.
- Maintain biofloc balance by adjusting C/N ratio when necessary.
Conclusion
Setting up a biofloc tank for maximum fish growth requires careful planning, proper water management, and consistent monitoring. By following the steps outlined in this guide—choosing the right tank, setting up aeration, maintaining water quality, and implementing a proper feeding strategy—you can ensure a highly productive and sustainable aquaculture system.
Biofloc technology is an excellent way to reduce feed costs, improve fish health, and increase yield, making it one of the most promising solutions for modern fish farming.


